I spent the weekend (when I wasn’t at work) tye-dying. That in itself isn’t super unusual, I probably tye-dye more than the average adult, but this weekend was a little different.  Not my hands, my hands look like that every time. My friend Sunny’s bachelorette party is coming up, and since she’s the sun that we all orbit around, we’re going with an outer space theme. I’ve been tye-dying the galaxy.
 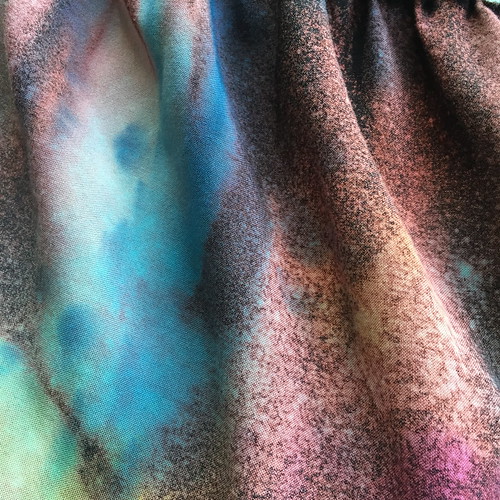 I got the original inspiration from this post on Doodlecraft, but here are a few extra tips to make sure your galaxy tye-dye goes as smoothly as possible.
Step 1
Consider Your Fabric
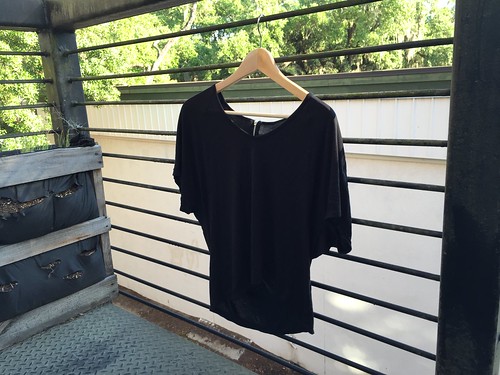
Obviously, you’ll want to start with a black base- a dress, a shirts, maybe some shorts- but you also want to make sure that the fabric will accept the bleach. I had this beautiful gauzy and sheer tank top that would have been perfect. Alas, the rayon (?) didn’t fade when I sprayed it. Today, we’re using a drapey cotton jersey shirt.
 Step 2
Wash Your Garment
This step doesn’t matter as much if you’re using a thrifted or previously washed item of clothing- or maybe it matters even more? But basically you want to get any icky, factory, stain guard chemicals out of your clothes.
Step 3
Spray with Bleach
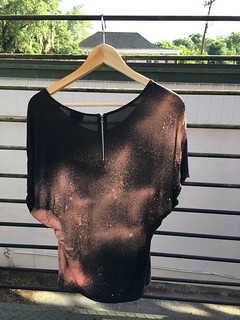
I mixed up some bleach + water in a spray bottle, about 2 parts bleach to 1 part water and sprayed in a diagonal slash across the front and the back of the pattern. You’ll want the bleach splatter very light in some places and very heavy in others. Experiment with a light hand on the trigger, allowing a few seconds for fading to start to show. It’s a lot easier to add more bleach to you project than take it away if you go too hard.
 Step 4
Let It Sink In
I let the bleached garment dry for a loooooong time. Like an hour. In that hour it went from the dark pink/red to a much more manageable and faded light pink.
Step 5
Rinse
Wash the bleach out in your washing machine.
Step 6
Let It Air Dry, or Not
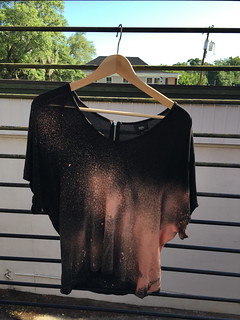
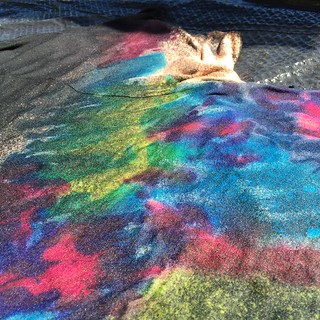
So for the tye-dying stage you want your fabric to be damp but not too damp. That perfect sweet spot is up to you. The drier your fabric, the less the colors will run together and the brighter your overall, finished product will be. The difference in the two pictures below is from tye-dying as soon as the dress came out of the washing machine (top) and letting it air dry for an hour outside (bottom). 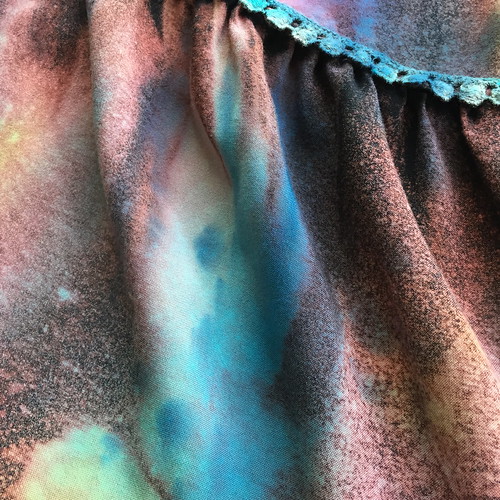
 Step 7
TYE-DYE!!!!!!!!!!
Using your favorite outer space colors (I used 2 shades of blue, fuchsia and green) to color your damp garment. Unlike traditional tye-dye, I didn’t use rubber bands create designs, I just painted with the squeeze bottles. A little here, a little there, a little more. The dye will soak through to the other side of the shirt. While that might not be awesome for other dye projects, it suits our needs just fine.
 Step 8
Let It Dry
Let it dry completely 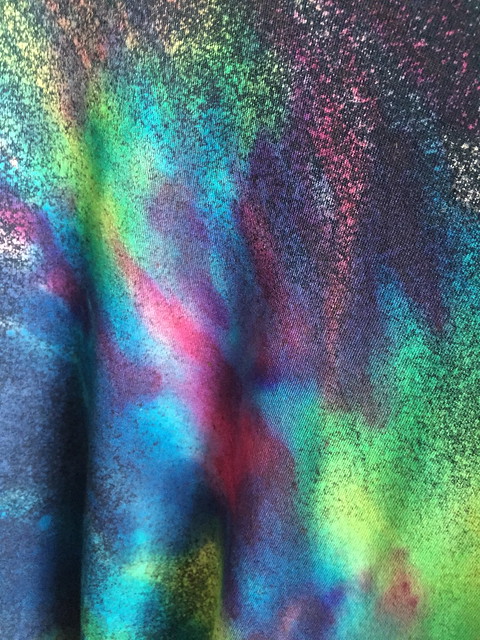 Step 9
Set the Dye
No home tye-dyed garment is ever going to beas vibrant and bright as it looks when it’s finished drying. The first time you wash your dye job, it’s going to run. There are 2 ways I know of to set tye-dye and minimize the inevitable color run. The first is heat- stick your completely dry garment in the dryer and let it spin around for a while. The second is vinegar- soaking a tye-dyed garment in vinegar will cause the colors to run/muddy slightly, but it’s also the best way to keep as much vibrancy as possible. After your dryer cycle, plunk your garment in a bucket or trash bag filled with white vinegar and let it sit for about half an hour.
Step 10
Wash It Out
Taking your garment out the of vinegar, ring the excess liquid out (gross, right?) and send it back through your washing machine and dryer. This is the big reveal moment. 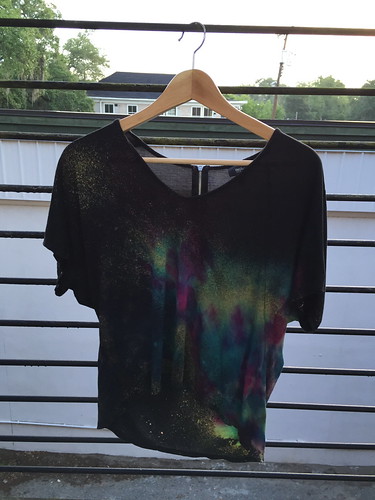
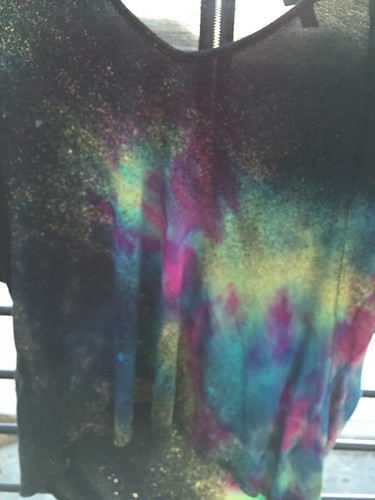
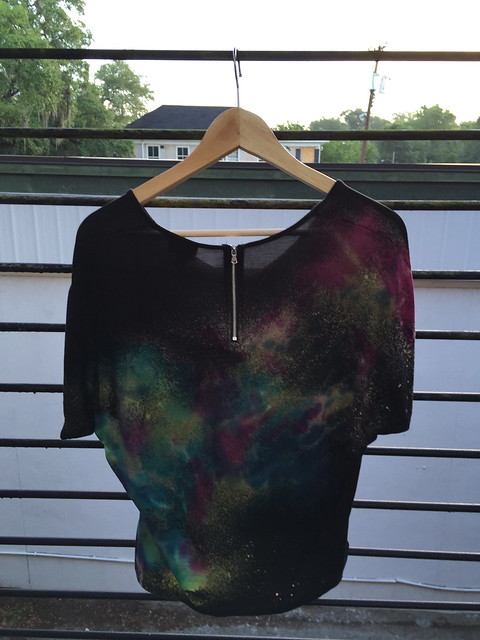 DOESN’T IT LOOK AWESOME!?!?!!?! Now if you’ll excuse me, I have to go turn every single black item of clothing in my closet into outer space wear.

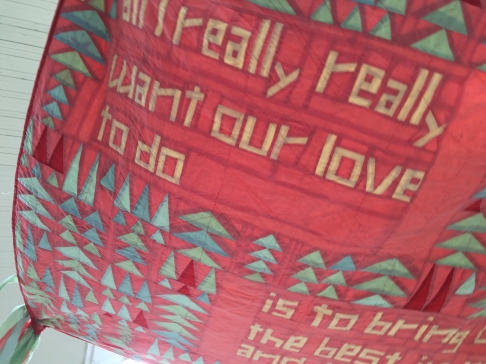
 Make the damn thing? Of course.